3 Beginner AI Agent Projects (Safe, Practical, Portfolio-Ready)
Updated on February 12, 2026 15 minutes read
Switching careers into tech (or leveling up for a better role) is rarely about knowing everything. It’s about proving you can solve real problems, ship clean work, and explain your decisions. That’s why portfolio projects matter more than collecting certificates or saving endless tutorials. A strong project tells a hiring team, “I can build, test, and deliver something useful.”
This article is for beginners who want safe, practical, portfolio-ready agent projects they can finish. You’ll get three project ideas that work for career changers, busy professionals, and bootcamp learners.
Each project includes a realistic scope, a sensible workflow, and the “hireable” polish recruiters notice. You’ll also learn how to present your work so it lands in interviews, not just GitHub.
Why agent projects work so well for beginners
Beginner agent projects are powerful because they show more than “I can code.” They show that you can design a workflow, make tradeoffs, and handle messy real-world inputs. Even a small agent-style app can demonstrate architecture, UX thinking, data handling, and testing discipline. That combination is exactly what entry-level roles tend to screen for.
Agent projects also scale with your skill level without forcing huge complexity upfront. You can start with a simple “input → transform → output” loop and add tool use later. As you grow, you can introduce memory, a database, evaluations, and a more polished UI. Your portfolio improves step-by-step instead of requiring a giant leap.
Most importantly, agent projects are easy to demonstrate in a short video.
A 90-second walkthrough of an agent turning chaos into clarity is instantly relatable to non-technical viewers.
That helps in screenings where recruiters don’t have time to read every file in your repository. It’s one of the fastest ways to show impact without needing a massive full-stack system.
What “safe” means for a beginner agent project
When people hear “agent,” they sometimes imagine something fully autonomous and unpredictable. For a beginner portfolio, you want the opposite: a system that is helpful, bounded, and transparent. Safety is not a buzzword here; it’s a design choice that makes your project credible. A safe agent builds trust, and trust is what makes it portfolio-ready.
Start by avoiding sensitive data and high-stakes decisions in your demos.
You don’t need private emails, bank data, or medical notes to build something impressive. Use sample datasets, anonymized examples, or synthetic inputs you create specifically for showcasing. This protects users and protects you from accidentally exposing private info in screenshots.
Next, keep the “agent” in assist mode, not autopilot mode. Drafting, summarizing, classifying, and recommending are ideal beginner behaviors. Automatically sending messages, deleting files, or taking irreversible actions is unnecessary risk. You’ll still demonstrate agent design, but with a human review step that looks professional.
Finally, make your agent’s boundaries visible in the product experience. A good portfolio project explains what it can do, what it won’t do, and what it needs from the user. That clarity makes your system feel like something a real team could actually deploy. It’s a subtle skill that hiring managers notice immediately.
A reusable blueprint for building any beginner agent
To keep your project from exploding in scope, build around a simple structure.
Think of your agent as a small product with a predictable workflow and limited tools. You’re not trying to create a “do everything” assistant; you’re shipping one job done well. This blueprint works for all three projects below.
Begin with a clear input and a clear output that you can describe in one sentence. For example, “Turn messy notes into a structured plan” or “Route support tickets consistently.” When the goal is sharp, your UI becomes simpler, and your code becomes easier to test. That’s the fastest route to a polished portfolio piece.
Then define tools as explicit functions, not magical abilities. A tool might be “save to database,” “retrieve from knowledge base,” or “create a summary object.” When tools are explicit, you can log them, test them, and explain them in your README. That’s what makes an agent project feel engineered rather than improvised.
Add a review step before the final output is accepted or saved. In practice, this means the UI shows a draft, and the user can edit or confirm. This one design choice improves safety, usability, and output quality at the same time. It also gives you a strong narrative: “The system supports humans, it doesn’t replace them.”
Finally, treat evaluation as part of the product, not an afterthought. Create a small set of test scenarios and measure whether the system stays consistent. You don’t need fancy benchmarks, just a repeatable checklist and a few edge cases. That level of rigor makes beginner portfolio projects stand out quickly.
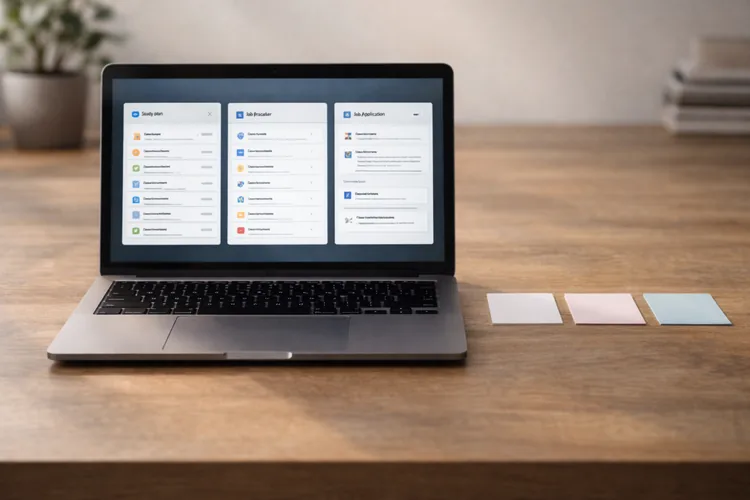
Project 1: The Learning Companion Agent

The Learning Companion Agent is an excellent first build because it’s useful, safe, and easy to scope. It supports study planning, explanations, and lightweight practice without needing risky integrations. If you’re learning coding, data, cybersecurity, or UX/UI, this project stays aligned with your goals. It also showcases product thinking: helping a user move from confusion to progress.
The problem it solves
Many beginners waste time switching resources without a plan. They watch videos, read docs, take notes, and still feel like nothing “sticks.” The real problem is often structure: no weekly plan, no feedback loop, and no revision strategy. A Learning Companion turns scattered learning into a routine you can follow.
In your demo, the user enters a topic, time availability, and a goal. The agent produces a 7-day plan with small tasks that build logically from day to day. Then the user can ask for explanations, generate quick quizzes, and track weak areas. It’s simple, but it feels like a real product people would actually use.
How the workflow should feel
The best beginner version is a guided flow, not a chat-only interface. A guided flow helps users provide the right inputs and keeps your outputs consistent. It also reduces ambiguity, which makes your system easier to test and debug. You can still add a chat panel later as an upgrade.
A typical flow starts with plan creation and ends with a weekly review. The plan is generated, then the user adjusts it based on real life and preferences.
During the week, the agent offers short practice prompts and summaries from pasted notes. At the end, it suggests what to revise based on quiz performance and confidence.
What to build first (without overcomplicating)
Your MVP should focus on one reliable loop: plan → practice → reflect. Build a simple page that generates a weekly plan and stores it locally or in a small database. Add a second page for quizzes that records results and shows progress over time. That’s already enough to demonstrate structure, state, and user-centered workflow.
When you’re writing your README, explain exactly what your agent does in plain language. Say what inputs it needs, what outputs it produces, and what the user controls. If your project is easy to understand, it’s easier to trust and easier to interview on. Confusing projects often get skipped, even if the code is good.
Safety and “hireable” quality
This project becomes portfolio-ready when you clearly keep it in the education lane. Add a short note that it’s for learning support,t and users should verify critical information.
If a user requests harmful or out-of-scope content, the system should refuse gracefully. That refusal pathway is part of what makes the project look responsible.
You can also add privacy guardrails without making the app complicated. Encourage users to paste only non-sensitive notes and avoid personal identifiers.
If you store anything, store the structured plan and quiz scores, not raw pasted text. That’s a realistic data minimization approach that hiring teams respect.
How to make it impressive without making it huge
Once the MVP works, deepen it with one upgrade that shows engineering maturity. A strong upgrade is a progress dashboard that makes learning measurable and motivating.
You can visualize quiz scores by topic and show a weekly improvement trend. Even a simple chart makes your project look more like a real tool.
Another strong upgrade is “revision suggestions” that explain the why, not just the what. Instead of saying “revise arrays,” your agent can say “you missed these concepts: indexing and slicing.”
That interpretability helps users and gives your project a thoughtful product feel. It also shows you understand feedback loops, not just generation.
Project 2: The Job Search Co‑Pilot Agent
If you’re changing careers, this is one of the most practical beginner agent projects you can build. It turns job hunting into an organized workflow and helps you tailor applications responsibly.
It also maps directly to hiring outcomes: clearer resumes, better targeting, and better interviews. That makes it both portfolio-ready and personally useful.
![]()
The problem it solves
Job searching often becomes chaotic fast. People save links everywhere, forget follow-ups, and apply with generic documents that don’t match the role. Then they get silence, assume they’re not qualified, and lose momentum. A Job Search Co‑Pilot creates structure and helps you focus on the applications that matter.
In your demo, the user pastes a job description and their current experience summary. The agent extracts key requirements, identifies missing skills, and drafts tailored bullet points. It can also generate interview practice questions aligned to the job’s responsibilities. This is valuable, but it stays safe because it drafts and suggests rather than auto-applying.
What the MVP should include
A strong MVP has two pages: a job analyzer and a lightweight application tracker. The analyzer converts pasted job text into a structured summary that’s easy to scan. The tracker stores company name, role, stage, and next action date, so nothing slips. Together, they form a full loop from discovery to follow-up.
When you generate tailored content, keep it constrained and truthful. Only use the claims the user provides, and label anything that needs confirmation.
For example, the agent can propose “Led a small project,” but it should ask if that’s accurate. This “truth-first” design makes your project ethically strong and recruiter-friendly.
How to make it safer and more credible
The easiest safety win is to include a “review and edit” step before saving drafts. Show the suggested bullets and cover letter paragraph in editable fields. Then the user confirms what’s true, adjusts tone, and saves the final version.
This not only improves safety; it improves writing quality and user trust.
You should also add a short quality check pass before output. If the draft is vague, the system can rewrite it to be more specific and measurable.
If the draft includes a claim the user didn’t provide, it should flag it for review. This makes your agent feel like a professional tool rather than a guessing machine.
How Code Labs Academy fits naturally here
If your goal is to turn projects like this into interview-ready portfolio assets, structure helps. A program like Code Labs Academy is designed around building job-ready skills through hands-on projects and mentoring.
That combination helps you ship cleaner work, get feedback on your repo, and learn the patterns employers expect.
It also supports the career side, so you can present your projects with confidence instead of guessing.
If you’re exploring options, you can browse the full Courses page and compare paths based on your target role.
For full-stack goals, the Web Development Bootcamp is a natural match for building product-grade UIs and APIs.
For analytics and modeling projects, the Data Science & AI Bootcamp aligns well with evaluation and data workflows.
If your interests lean toward security and safe automation, the Cyber Security Bootcamp can complement agent design with responsible tooling.
How to make it stand out in a portfolio
The fastest way to upgrade this project is to show measurable outcomes. Track how many roles you analyzed, how many you applied to, and how many replies you received. Even if it’s a personal tool, that data demonstrates product thinking and iteration. It also gives you real metrics to discuss in interviews.
You can also add a “skills gap plan” feature that turns missing skills into a short roadmap. When a job asks for something you don’t have, the agent suggests a two-week learning plan.
This connects job requirements to study actions, which is incredibly relevant to career changers. It also ties the project back to learning and growth, not just drafting documents.
Project 3: The Support Triage Agent
The Support Triage Agent is a classic business workflow project that looks great in interviews. It mirrors how real teams handle tickets: summarize, categorize, route, and draft a response. It’s also safe because you can build it entirely with synthetic tickets and a small knowledge base. That makes it practical and portfolio-ready without needing real customer data.
The problem it solves
Support teams spend time repeating the same answers and manually sorting requests. When ticket volume rises, response time slows and consistency drops. A triage tool reduces that load by standardizing summaries, categories, and suggested replies. Even small improvements here can create meaningful operational impact.
In your demo, the user pastes a ticket message into the app. The agent produces a summary, labels the issue category, and suggests a draft response. It also pulls relevant help content from a local knowledge base and cites what it used. This creates trust because the draft is grounded in actual documentation.
What to build first
Start by creating a small knowledge base file, such as a set of FAQs or support articles. Keep it realistic: password reset steps, billing changes, refund rules, and troubleshooting basics. Then build retrieval so the agent can find relevant snippets before writing an answer. This is how you reduce hallucinations and increase consistency.
Your MVP interface can be simple and still feel professional. A single “ticket input” area with a results panel that shows summary, category, and draft reply is enough.
Add an “Escalate” button that logs the ticket for human review rather than sending anything automatically. That keeps your app safe while demonstrating real workflow design.
How to make it feel production-aware
A portfolio-ready triage agent should behave cautiously when uncertainty is high. If the knowledge base doesn’t contain an answer, the system should say so and escalate.
If the ticket involves account access, payment disputes, or security concerns, it should be routed carefully. That cautious behavior is exactly what real businesses expect from automation.
You can also add lightweight redaction in your UI for better privacy. Mask emails and phone numbers in the displayed ticket text before storing any logs.
Store only what you need, such as category, urgency, and a summary.
This shows strong judgment without turning your project into a compliance nightmare.
A standout upgrade
A strong upgrade is a small dashboard that shows ticket distribution by category and urgency. This gives your app a “manager view” that feels very real to business stakeholders. You can also add an admin page to edit routing rules so the system is transparent and adjustable. That’s a subtle but impressive signal that you think beyond the happy path.
How to package these projects so they actually get interviews
Most portfolios fail for predictable reasons: unclear story, messy repos, no demo, and no proof of quality. Your goal is to make it easy for someone to understand your project in under one minute. That doesn’t mean dumbing it down; it means communicating like a product builder. Clear communication is a career skill, not just a writing trick.
Start with a README that reads like a mini product page. Explain the problem, the target user, and the workflow from start to finish. Include a short architecture overview and describe what the agent can and cannot do. Then add setup steps that work the first time, because a broken setup kills interest instantly.
Next, record a short demo video that shows one full workflow. Choose a single scenario and walk through the input, output, and review steps. If possible, show one edge case where the system refuses or escalates safely. That moment often impresses more than the “perfect” output.
Finally, include evidence of quality and iteration. A small evaluation set, a few tests, or a simple “before vs after” improvement note is enough. You’re showing that you can debug, refine, and improve, not just generate something once. That’s exactly how real teams work, even at the junior level.
If you want guidance on presenting projects effectively, career support can help a lot. Code Labs Academy’s Career Services Center focuses on CV, portfolio, and interview preparation in a structured way. That kind of feedback helps you translate a project into a strong narrative for recruiters. It also helps you avoid common mistakes like underselling impact or overexplaining technical details.
A realistic timeline if you’re studying part‑time
A practical schedule is what turns an idea into a finished portfolio piece. If you’re working full-time, aim for a four-week cycle per project rather than chasing perfection.
Week one is for a working MVP, week two is for UX polish, week three is for testing and evaluation, and week four is for documentation and deployment. This rhythm keeps you shipping and prevents endless “almost done” projects.
The MVP week should focus on one workflow that works end-to-end. Get input, run your agent steps, show output, and allow edits or confirmation. You want a usable prototype quickly because it reveals what matters and what doesn’t. Once the loop works, everything else becomes easier to prioritize.
The polish and evaluation weeks are where your project becomes hireable. This is when you add guardrails, refusal behavior, clear logs, and a tidy UI. It’s also when you create demo inputs, write your README, and record your walkthrough. These steps are what make a beginner project look professional.
If you want a structured path and a consistent pace, you can book an admissions conversation. The Schedule a Call page is a simple way to talk through goals, learning formats, and which track fits your timeline. It’s especially helpful if you’re deciding between web development, data, cybersecurity, or UX/UI. Clarity here makes it easier to choose the right project and ship it faster.
Conclusion
Beginner agent projects are one of the most efficient ways to build a portfolio that feels modern and practical. They let you demonstrate workflow design, tool use, safety boundaries, and real product thinking in a small scope. If you ship one polished agent project with a clean demo, you’ll have something worth discussing in interviews. That’s the goal: work that creates conversations.
Choose the Learning Companion if you want an educational tool that’s safe and easy to demo. Choose the Job Search Co‑Pilot if you want a project that directly supports your career change. Choose the Support Triage Agent if you want a business workflow that mirrors real teams. Then commit to shipping a strong MVP and polishing it into something you’re proud of.
If you’re ready to accelerate your progress with a structured curriculum, mentor feedback, and career support, explore the full list of
Code Labs Academy bootcamps.
You can also jump directly to the Application page when you’re ready to take the next step. A focused program plus a portfolio plan can shorten the path from “learning” to “hireable.” That’s how you turn your next project into your next opportunity.